Building a media inbox with Obsidian and Readwise
September 27, 2021 / 5 min read /
0 Likes •
0 Replies •
0 Mentions
I love Readwise. It makes collecting your highlights from everything and moving them around so effortless.
Recently, Readwise updated their integration with Obsidian to include the last highlighted date as a property we can export. This lets us build an extremely flexible media inbox in Obsidian using the Dataview plugin.
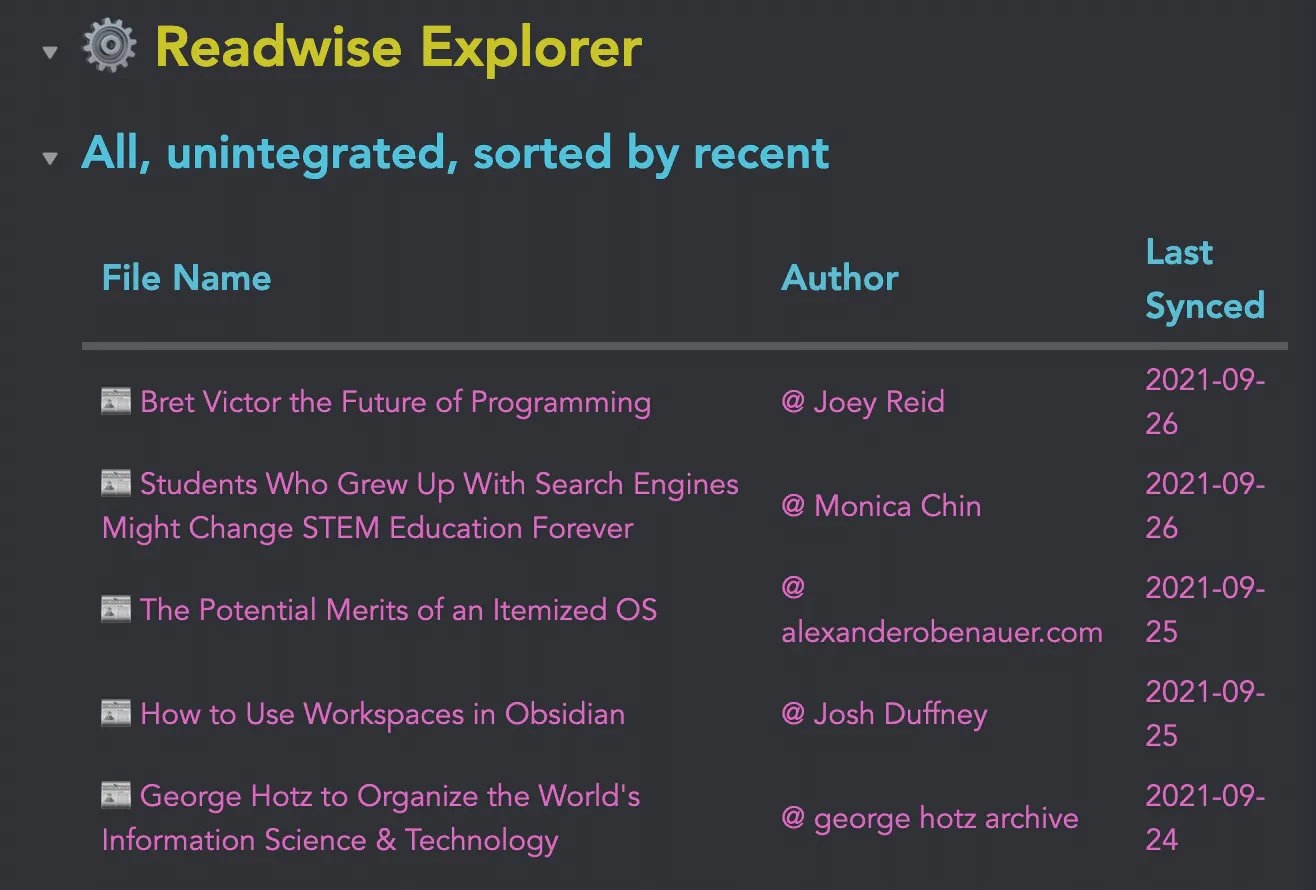
In this tutorial, we will be building a dynamic table in Obsidian that grabs our most recent, unprocessed highlights notes. It will look something like this:
Prerequisites
To follow along with this tutorial, make sure you have a Readwise account set up with some highlights. You can use my referral link to get a free month of Readwise to start!
Additionally, make sure you have the Obsidian Official and Dataview plugins installed from the Obsidian community plugins, and make sure both are enabled.
Configuring the Readwise plugin and export
Go into the Obsidian settings, and go to the Readwise Official settings. First connect the plugin to your Readwise account, then you will see the following:

Then set the base folder that you will sync your export to, then click the customize button to be taken to the web interface for the Readwise export:

I have the following settings on this page:
Group Files In Category Folders
On, default settings
Use Custom File Name
On
File Name
1{{ "📚" if category == "books"}}{{"📰" if category == "articles"}}{{"🐦" if category == "tweets"}}{{"🎙" if category == "podcasts"}} {{ title }}
Page Title
1# {{ "📚" if category == "books"}}{{"📰" if category == "articles"}}{{"🐦" if category == "tweets"}}{{"🎙" if category == "podcasts"}} {{ title }}
Page Metadata
1{% if image_url -%}234{% endif -%}5## Metadata6- Author:: {% if author %}[[@ {{author}}]]{% endif %}7- Full Title:: {{full_title}}8- Category:: {{ "📚" if category == "books"}}{{"📰" if category == "articles"}}{{"🐦" if category == "tweets"}}{{"🎙" if category == "podcasts"}}9{% if url -%}10- URL:: {{url}}11{% endif -%}12- Synced:: [[{{last_highlighted_date|date('Y-m-d')}}]]
Highlights Header
1{% if is_new_page %}2## Highlights3{% elif has_new_highlights -%}4## New highlights added [[{{date|date('Y-m-d')}}]]5Synced:: [[{{date|date('Y-m-d')}}]]6#status/integrate7{% endif -%}
Highlight
1- {{ highlight_text }}{% if highlight_location and highlight_location_url %} ([{{highlight_location}}]({{highlight_location_url}})){% elif highlight_location %} ({{highlight_location}}){% endif %}{% if highlight_note %}2- Note: {{ highlight_note }}{% endif %}
YAML Front Matter
1tags: media/captures/{{category}} status/integrate2imported-to-readwise: {{date|date('Y-m-d')}}
The important pieces for our inbox:
- The #status/integrate tag in
YAML FrontmatterandHighlights Header
You can choose whatever tag you want here, but this is a status tag we will be using on initial sync and new highlights added to indicate that we have not processed this note yet.
- Synced:: property in
Page MetadataandHighlights Header
This adds the date as a link in YYYY-MM-DD.
(Note that this will link your Readwise export notes to the daily notes in your graph. It is significantly more difficult to accomplish the Dataview query without these links.)
Additional notes on configuration
All properties in the Page Metadata are given the double colon (::) to make them properties that Dataview will recognize.
Additionally, I have chosen to add the Author as a link using the [[@ Author]] convention I use in my vault. Feel free to change this if you do something different, it will not affect the end product.
Building the Inbox with Dataview
After the dataview export is configured, go back to the Readwise Official settings in Obsidian and click Initiate Sync. After the export is done, place the following dataviewjs query in a note:
1```dataviewjs2const mediaType = ""3const numToShow = 54const mediaFolder = '"030 Media/Readwise"'5const statusTag = '#status/integrate'67const conditions = [mediaFolder, statusTag]8const filterCondition = conditions.join(' and ')910dv.table(["File Name", "Author", "Last Synced"],11dv.pages(filterCondition)12.sort(p => [].concat(p.synced).reduce((a,b) => {return a > b ? a : b;}), 'desc')13.slice(0, numToShow)14.map(p => [15p.file.link,16p.author,17[].concat(p.synced).reduce((a,b) => {return a > b ? a : b;})18]19)20)21```
There are 4 properties to set here:
mediaTypewill filter on theCategory::property in your export. Leave it blank for all Readwise media, or set it to 📰 to get only articles, for instancenumToShowis the number of results that will display in your inbox table.mediaFolderis the base folder for your Readwise export, and should be the same as what you set in the plugin settings. Note that it MUST be surrounded with double quotes ("")statusTagis the name of the tag you want to filter on. I have it set to grab #status/integrate as our unprocessed status tag, but you can leave it blank for no tag filtering.
If all goes well you should have a table now that looks something like this:

Nice! If you have any questions, feel free to reach out to me on Twitter or in the Obsidian Discord (jmill#1001)
Fetching Replies...
Do you have any questions, comments or simply wish to contact me privately? Don’t hesitate to shoot me a DM on Twitter.
Want more jmill in your life?
Get a monthly email from me about my ideas, as well as exclusive previews of upcoming articles and projects.
In this tutorial, you will learn how to build a dynamic media inbox in Obsidian to process your Readwise highlights.